Total War: ELYSIUM – The Art of Battle
How does a card go from a simple brief outlining its basic functions and a rough idea of what it should look like, to a masterpiece that perfectly represents the use of the card?
We asked our Art Coordinator Heather Reynolds to dive into exactly how the artwork for Total War: ELYSIUM is put together, here’s what she had to say:
Context – Setting the scene
The exciting unique aspect of Elysium is that we do not have any in-house card art illustrators, all the card art is outsourced to external artists which creates exciting creative opportunities and some challenges. We have a large pool (upward of 20) of talented and reliable artists.
It is really rewarding to work with multiple artists who will bring their own style and perspective to the artwork, however it is my responsibility to ensure the card art feels consistent in both quality and style. Whilst each artwork will have the artists distinct style, the overall collection must come together and feel cohesive.
Our guiding principles for card art are:
- DO: Use a vibrant and highly saturated colour palette.
- DO: Use light and colour to focus on the core element that is at the heart of the illustration.
- DO: Create simple shapes, strong silhouettes & depth.
The Process
We streamline the process by requesting that the artist send regular updates for approval. The stages include high-level tonal and colour sketches as well as two detail passes and then the final piece. Tracking the work at different stages is important to ensure the work will be finished in time and to identify any potential issues as early as possible to avoid costly last-minute changes.
Often cards are re-worked long after they first go into the game which, on occasion, impacts the artwork. For example, a card could switch era or faction, which means the setting or armour depicted is no longer appropriate for that time period. Therefore, it is important to work with a degree of flexibility and not get too precious about particular artworks.
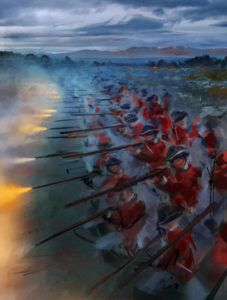
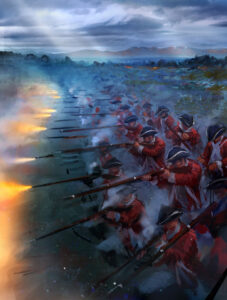
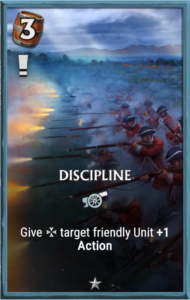
Case Study: Discipline
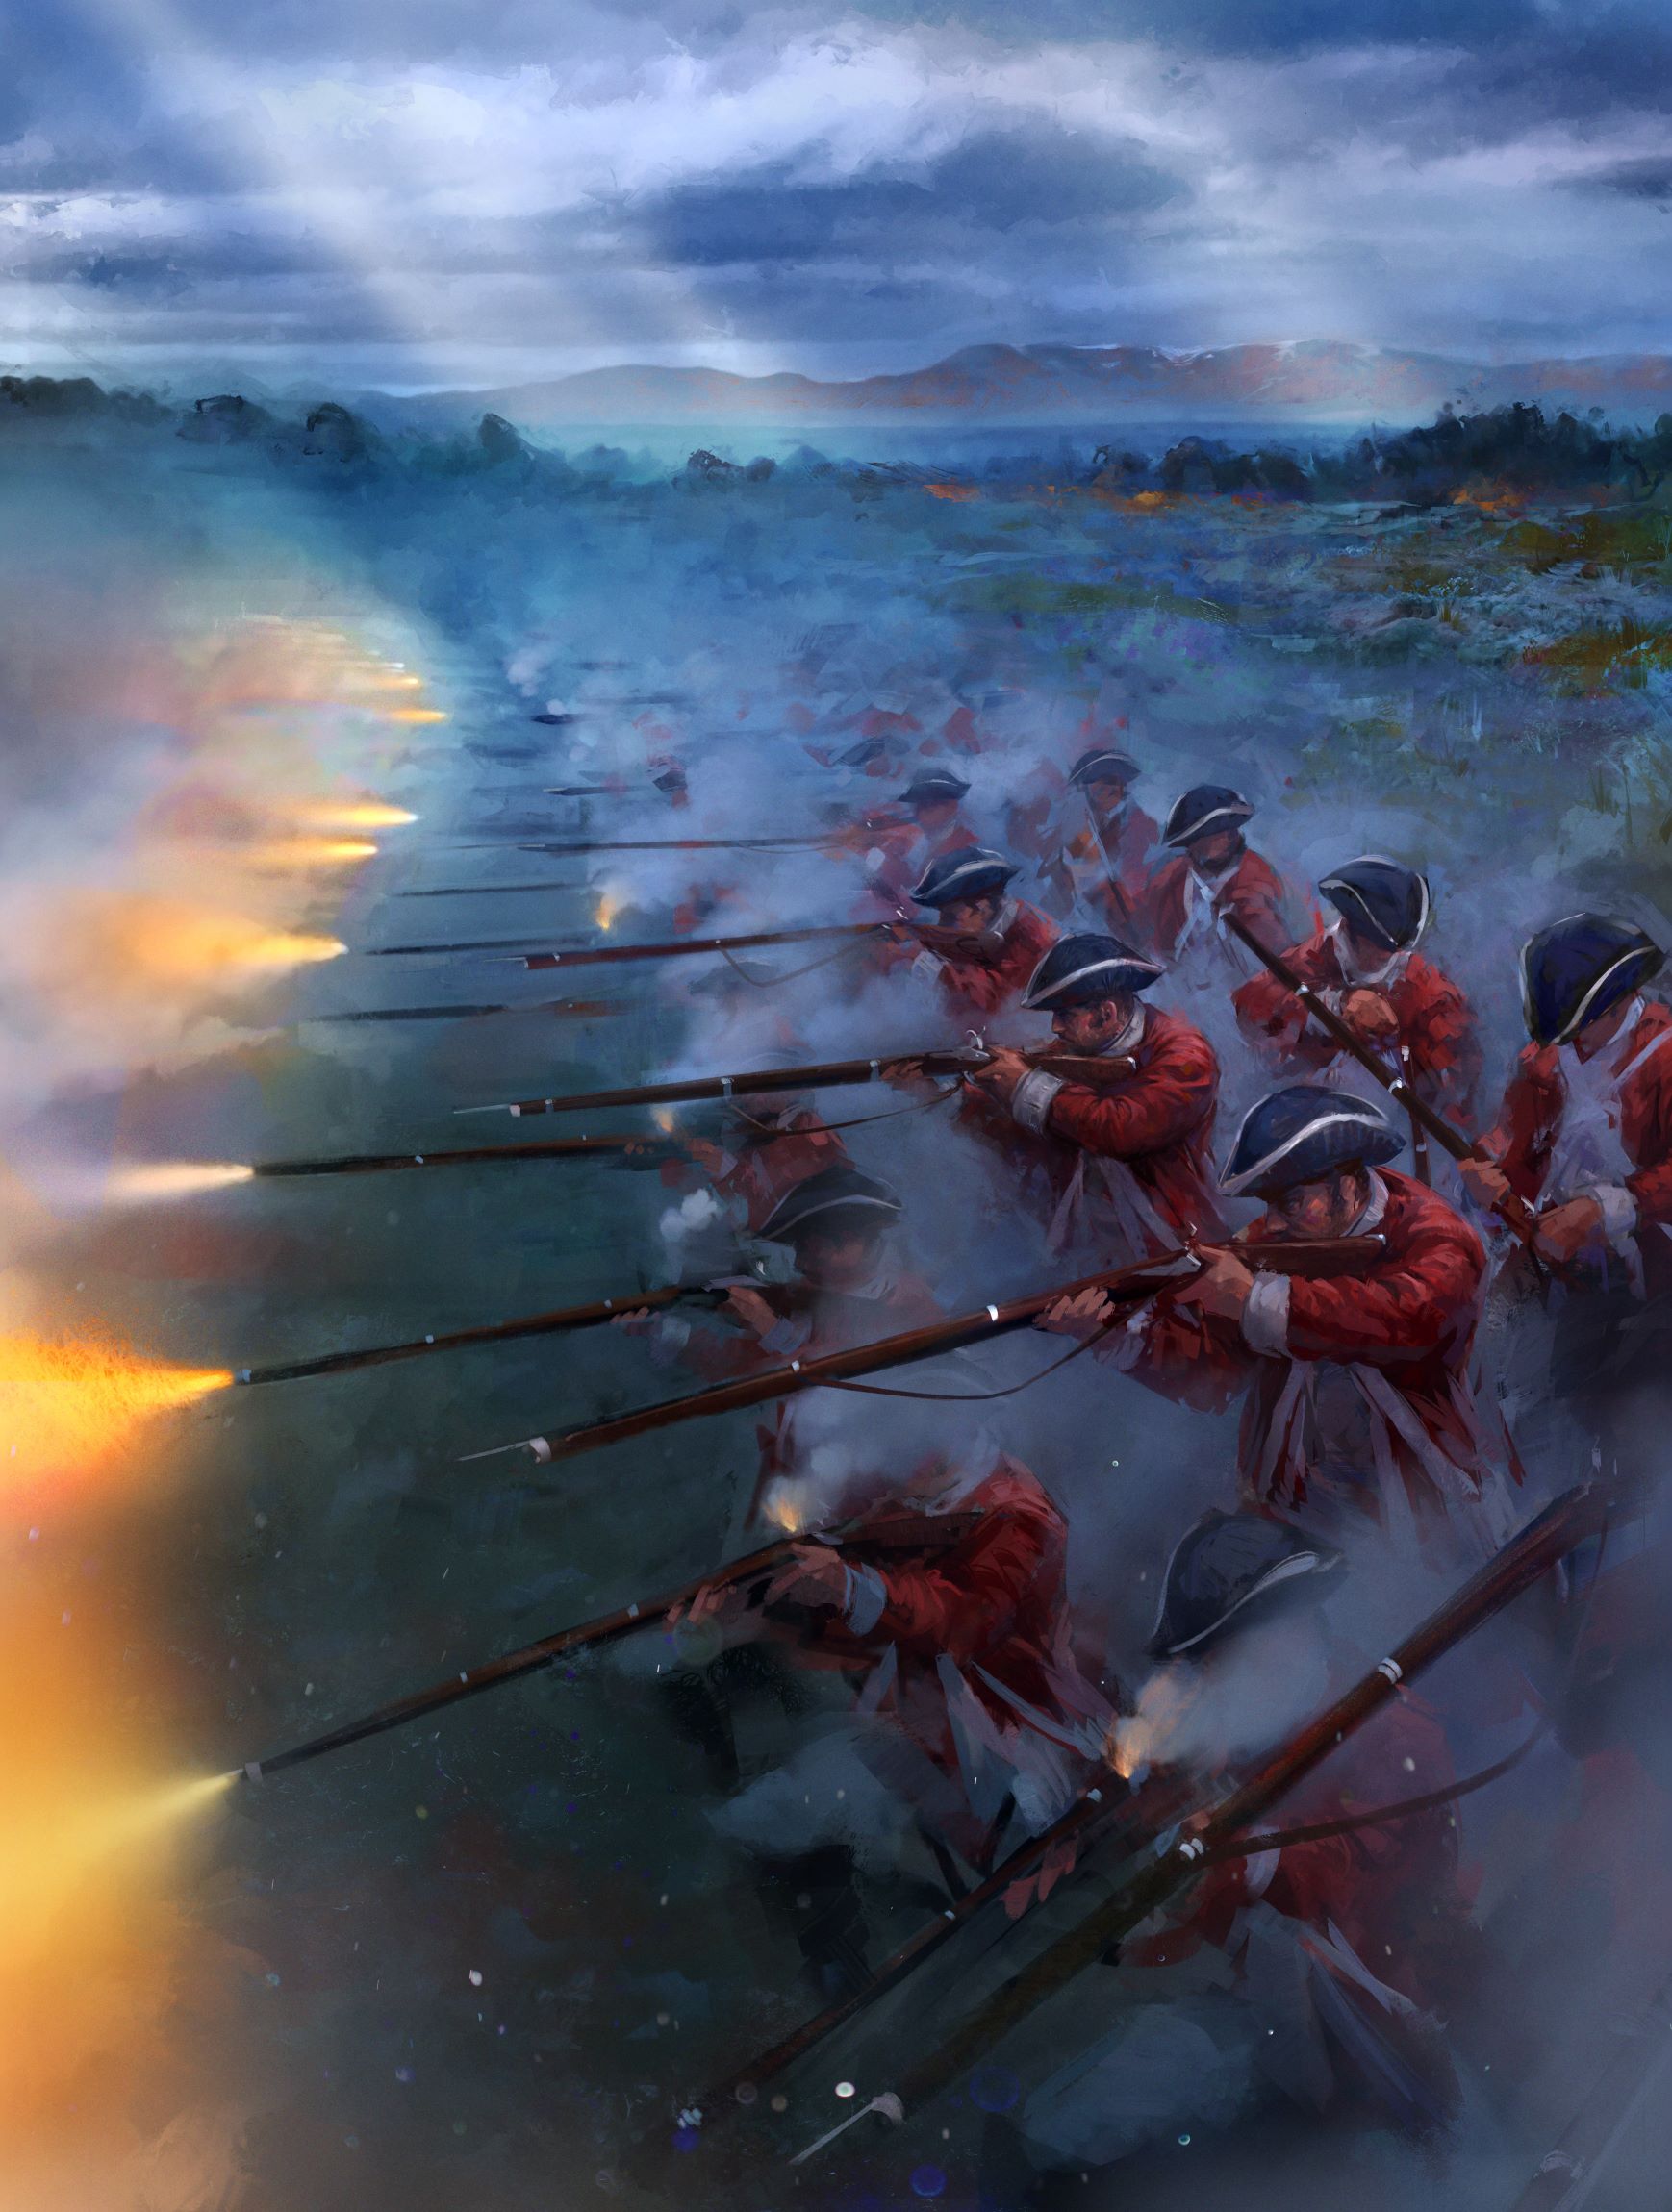
To kick things off, I work with Design to understand the key aspects of what the card does and ensure the brief communicates that effectively. In the case of ‘Discipline’ the brief stated that the artwork needed to depict a volley fire – a well-drilled, disciplined line of soldiers. With this card, we wanted to present a strong sense of mood and atmosphere so opted for the Scottish moor setting.
Sketch stage
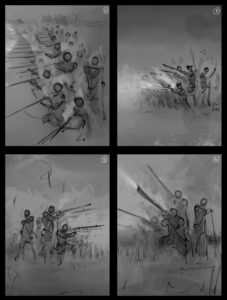
This first stage is arguably the most important – nailing the composition. Here we must consider how best to illustrate the brief whilst also considering all the other card art to avoid any cards looking too similar.
We generally ask for 4-6 thumbnail sketches to establish a high-level composition. In this case, the artist’s four sketches were all quite different which was great. We really encourage the artists to propose a variety of suggestions at this early stage.
When selecting a sketch, it is important to look at it in the context of the game. We drop it into the card template to ensure the important areas aren’t covered by the card’s UI elements. Likewise, where relevant, we also view the sketches in the unit or structure tokens to ensure the image is readable on the board.
In this case, we opted for sketch one as this presented the long row of soldiers, which communicated the orderly feeling mentioned in the brief. We did ask the artist to alter the composition slightly and shift the row of soldiers to the right so there was a clearer spatial divide between the left and right sides of the composition.
The artist then came back with the colour sketch. They had incorporated our previous notes on the composition and introduced a colour wash. At this stage we don’t have any details and it is still high level.
We were really pleased with the colour palette the artist had created. The cool blues communicated the misty atmosphere of the Scottish Moor setting and allowed the red uniforms to really pop. Finally, the strong glowing yellows added another element of interest within the frame. This is a great example of using colour to convey the strong mood.
Once we have the composition and the overall colour palette locked down, the third step can begin: introducing a first pass of details to the characters. This means adding an initial layer of granular detail, cementing the lighting and beginning to refine those shapes and silhouettes.
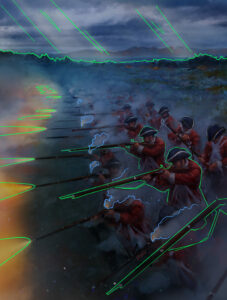
At this stage we expect the artist to really have refined the mark making so it feels like a polished illustration. Now is also the time to consider the structure of the image. We require high-res layered artworks, so it is important to discuss with the artist how we want the artwork broken down. In this case, we wanted the main characters in the foreground, the gunfire on a separate layer to the others. The artist proposed this by highlighting the areas he had separated.
After a couple of rounds of polishing and final rendering, we receive the final artwork as a layered PSD. Here is when my work with the artists ends and I start the process of getting in the artwork in-game.
It is my job to ensure the artwork looks good in all the formats we may see in game – the card, token and thin slice we see in the deck creation screen. Up until now I have visualised these in photoshop but now I do the final comp in the editor to ensure we get the right look for what the player will see. Sometimes this involves manually tweaking the crop we see in the token or adjusting the ‘slice’ the prefab has selected to an area of the card that has more interest.
Until Next Time
Keep your eyes peeled for our next behind-the-scenes blog soon, but in the meantime, if you missed our last blog on how we design our cards, check it out here. And make sure to sign up for news about the Total War: ELYSIUM closed beta here.
Related Posts