How sieges work in Total War: WARHAMMER III
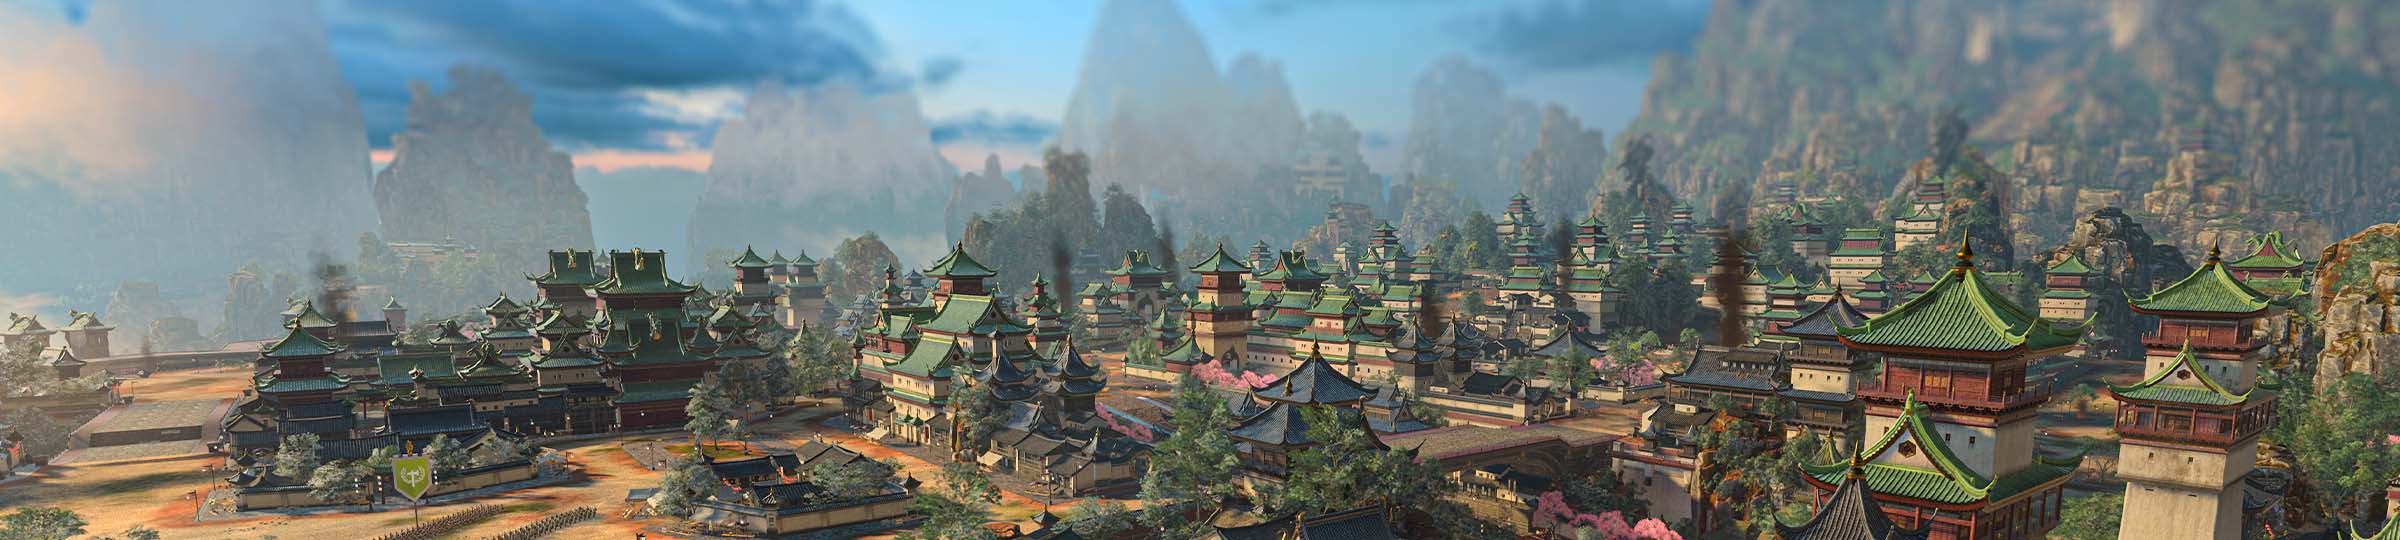
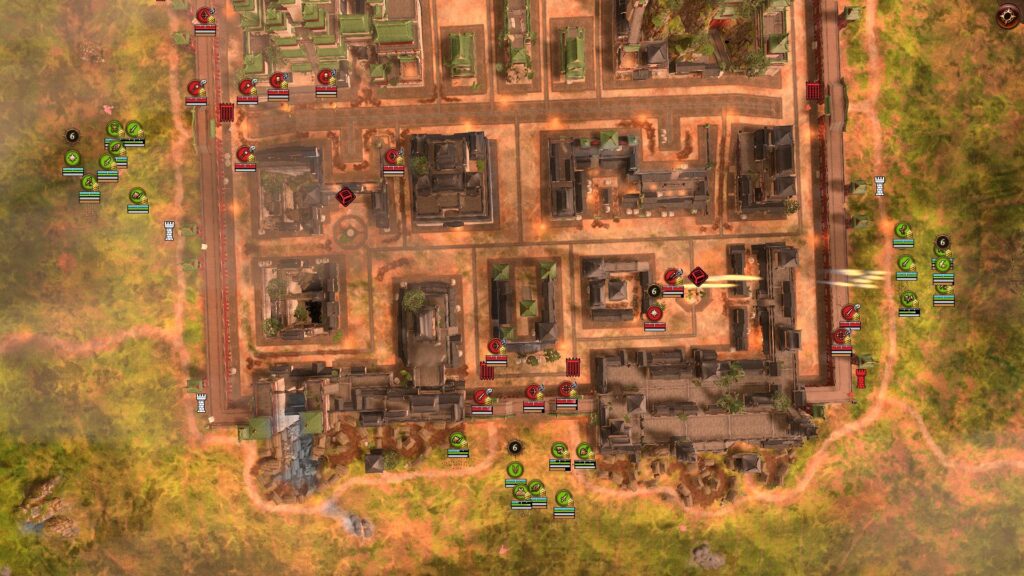
Welcome back to Castle TotalWar.com, after a months-long, grueling siege of our gates, we’re offering a peace/trade deal. You receive: information on sieges and minor settlement battles in Total War: WARHAMMER III. We receive: (hopefully) your excitement and happiness. Given you’ve clicked we’ll assume you want to take that and move right into it. Below you’ll find all the details on how we’re upgrading and modifying sieges in WARHAMMER III, alongside the plans for minor settlement battles, and how it impacts some of the most important sieges there are – the massive attacks from the Chaos Wastes on the Great Bastion of Grand Cathay. Plus, a couple of screenshots of the layouts of Wei-Jin and Nan Gau, two Cathayan cities you will be getting intimately familiar with in your campaigns. These are pre-release shots from an aerial angle to show you the layouts, so just remember they represent a game still in development.
Sieges
The alterations to sieges come in two major components, both of which are vital to understand to see just how much things have changed. The first is in the map design itself, the philosophy of that, and the variety we’re introducing through them. There is now a much, much wider selection of potential siege maps, each assigned to a settlement based on their default faction’s culture, themes, and preferences for combat. Cathay and Dwarfs build highly defensive fortresses set into the sides of mountains, where their firepower can be exploited to its fullest. Meanwhile, Kislev has long withstood Chaos with tight streets and hardy men and women who will fight tooth and claw for every inch. Races like the Skaven and Greenskins have more ramshackle fortresses that are no less deadly, which themselves pale in comparison to the weirdness of the strongholds dedicated to each Chaos God on the outskirts of the Realm of Chaos.
The upshot of all this is that each time you enter a siege, no matter which side you’re on, the combination of your army, the enemy, and the layout of the settlement is going to make it a unique experience across many hours of play. We’ve deliberately paced the layouts of different settlements to avoid repeats between adjacent regions, and even factions that share layouts have different dressings that can impact gameplay as well as looks. Fighting two identical siege battles back-to-back should be a thing of the past
These maps themselves have been designed significantly differently from what you may be used to from WARHAMMER II. As well as the capture points and buildable towers and barricades which we’ll get into below, we’ve upgraded our tools, AI, and design to make for much better maps. One significant area is height variation, with much larger differences between elevation levels throughout a map and it being far more common that before. There are also dockable terrain areas within settlements, depending on their layout, giving ranged units more use inside the walls. These advancements also allowed us to add bridges to maps, giving new ways to move around settlements and creating tactical possibilities we haven’t seen before.
With this variation comes more open areas within settlements, which allows for far more diversity in viable unit types. A fight no longer starts and ends at the outer wall – of which many settlements now have several, making for two or three approach angles for attackers – and sieges are a much more interesting and realistic prospect of steadily defending and capturing areas of a town, city, castle, or Hell Pit. It makes defensive siege weapons a far more promising prospect, be they firing from the high ground inside a settlement past the outer walls or defending the streets themselves with clever placement.
The second big upgrade is introducing the supplies and buildable structures we first introduced to you in the Survival Battles mode. While it is the same system and basic understanding, the use is completely different. Sieges now feature several capturable locations rather than one, and each provides supplies per second, as well as governs a few buildable locations – if they’re lost, their attached buildings are destroyed. These come in two varieties, either towers or barricades.
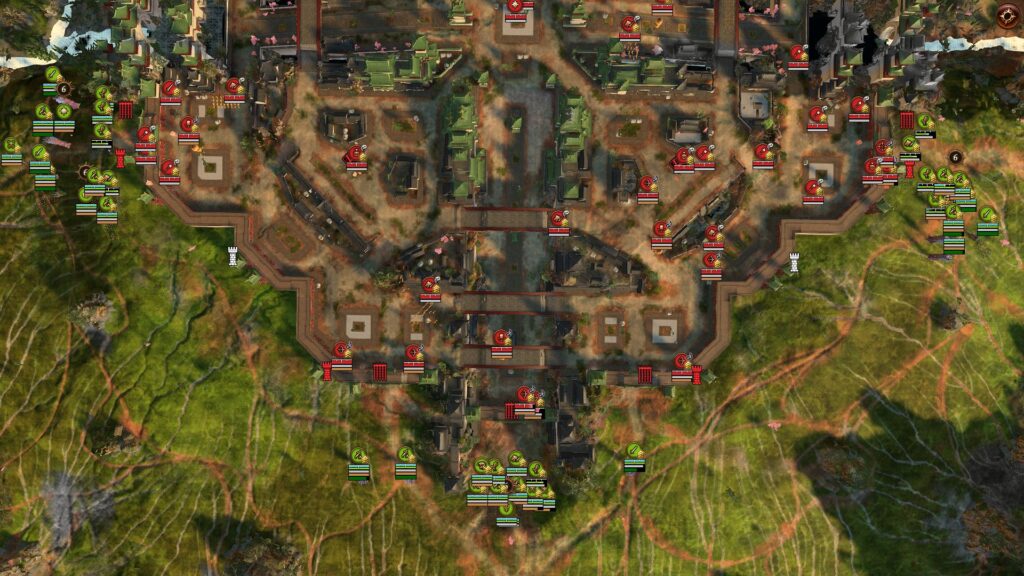
The big idea is that your initial defence will be focused on the walls. When these fall to your enemy’s combination of artillery, flyers, siege towers, and brute strength – some units can now attack walls directly, as they can gates – you can retreat into the city and create a custom-made secondary line, with barricades, towers, firing platforms, and monuments where you want them. This allows you to create your own battlelines depending on your playstyle and the specifics of that battle. Each point can be upgraded or downgraded as you wish, for the relative cost of building, making you able to shift your strategy on the fly. Naturally, while this system is shared with Survival Battles, balancing is done differently to ensure good gameplay.
Each settlement also has a stockpile of supplies for you to begin the battle with. In Campaign, this is determined by various factors – buildings and level of settlement being the most notable, as well as scaling into the late-game for the more major, double-full-stack encounters that occur at that stage. This allows you to construct a few important towers and barricades to begin with, already garrisoning them with troops or using them as tactical chokepoints. In general, the new maps are much larger with many more potential points of entry for your foe, so all these additional resources are going to be needed to keep things in check.
As your opponent pushes in, you need to make decisions about which supply points and the districts they control are worth defending. Attackers cannot construct buildings or use supplies, nor do the supply locations provide victory points, but denying you them allows for more ways to move through your settlement. Dismantling defences and moving them to a new location to secure and fight the battle anew is vital strategy against the overwhelming odds that are often levied at a besieged settlement.
There are also two special capture points – one key building, and one victory location. The key building is usually closer to the center of the settlement, and it provides a defensive buff if it is under the control of the besieged. Previously we had defensive bonuses that weren’t always clear, so we’ve cleaned that up with this single, clear benefit. The final victory point is also still there, and usually the farthest from the gates. It will mark either the glorious taking of a supposedly impenetrable fortress, or the immovable object of your defensive forces proving their worth. Victory tickets are provided by both these capture points.
The upshot of all this is that siege battles will be more interesting, more exciting, more varied, with greater tactical depth and more diverse unit viability. New and larger map layouts with better terrain, cultural differences between factions being represented, plus the new home turf advantage of towers and key buildings all combines for a new experience.
We’ve also improved the AI, not only to handle all these new elements, but also to provide more of a challenge whether you’re attacking or defending. Flyers and fast-moving units will now prioritise useful actions like preventing sallied-out cavalry from attacking ranged or siege units. The AI also has a greater understanding of how different areas of the map are under threat, and when they should withdraw to prevent losses. This makes it more reactive and capable of fighting against diverse enemies. Many of these improvements are direct from THREE KINGDOMS and TROY, bringing the WARHAMMER trilogy right up to the modern day in terms of our best-designed Total War titles.
James Martin, of Survival Battle fame, has been taking us through everything so far, here’s his direct take on the AI changes: “We started with the 3K AI as it provided us with a good base to work from, the 3K settlement AI had been very well received and worked well for our new settlement layouts. From there we put a lot of work in to how we author our siege AI graph to make it easier to design and more flexible to work with, which has also improved the pathfinding within settlements. With the introduction of the ‘districts’ concept via the capture locations and supply points, the AI can now separate and manage large parts of the settlement map and say, ‘this area over that area, this district is more threatened than that one.’ They can then prioritise or fall back if one is overtaken by the attacker. For the settlement battles they also know how to build towers and barricades, which is something they don’t have to do in Survival battles.”
It also means that sieges are more challenging for the attacker, and defenders – particularly when manually controlled – can apply meaningful losses even with small garrisons if played well. It will take a true army to bust through the defence of a fortress and starving out the defenders through newly re-balanced attrition may be a better option than charging the walls. Of course, every day you spend starving them out is another day of them building supplies to construct defences should you attack before they give up.
Minor Settlement Battles
This is all further enhanced by the minor settlement battles coming to WARHAMMER III. They follow many of the same improvements as sieges, most notably that we have designed a huge number of special maps for each minor settlement, rather than using lightly modified land-battle maps. The main difference is these are not walled, but otherwise use the same systems of a key building, districts, towers, and barricades. Victory requires either a routed enemy or captured settlement, as in other Total War games.
As mentioned, the defenders still have a supply count to build barricades and towers. Without an initial wall to act as a stopgap, it’s a much more frantic defence which can shift and move at any time. You’re unlikely to have time to build up a full stock of supplies while waiting for the enemy to get past your first line, so making sure your initial placements are up to snuff is vital.
Barricades are in positions that prevent deeper access to a settlement or, at the very least, demand that attackers take a more circuitous route. Towers are on platforms that are out of reach from melee units – only flyers and ranged units can target them. However, they are also destroyed if their attached capture point is taken, making quick-moving or stealthy troops another option.
For balancing reasons, we’ve made it so flying units and summoned units cannot capture points, though there’s nothing stopping them from wiping out the forces surrounding it and having some of their land-locked or corporeal allies come in to assist. Flyers are particularly effective at preventing defending ranged units from peppering your other attackers as they approach.
Minor settlement battles are now exactly what they should be – smaller sieges over less massive settlements, but with all the same grit and determination from both sides to conquer the area. They’re varied from each other, normal land battles, and other sieges, adding a third to the usual most common two types of battles. The new layouts and options also mean that, should you wish to, taking manual control over a defense against a rampaging army can really whittle them down over time, making it easier to defend your lands if your main armies are off making war elsewhere.
The Great Bastion
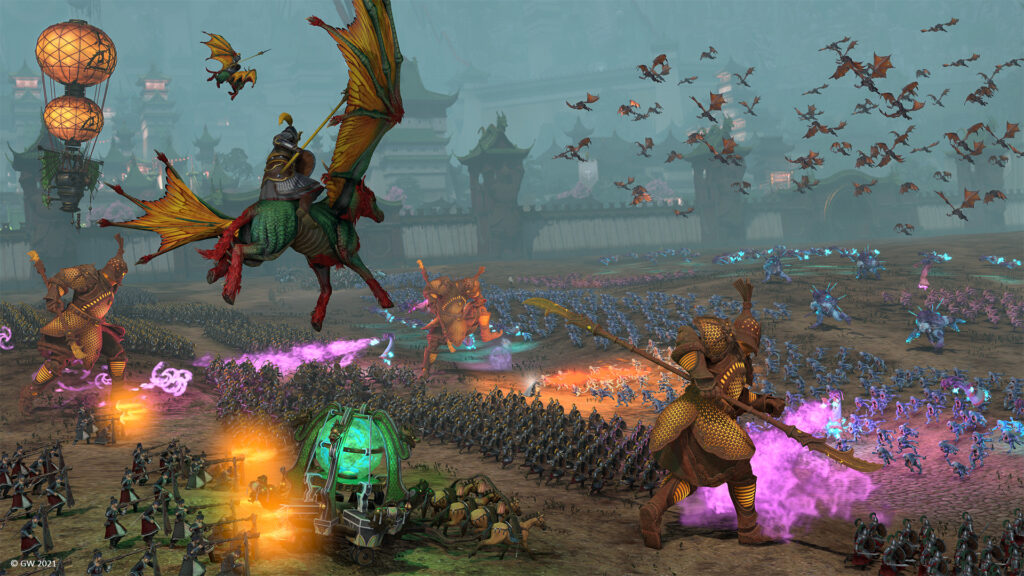
Nowhere are the changes to sieges more relevant than in Grand Cathay. The Great Bastion is a mighty wall built to contain the tides of Chaos many thousands of years ago by the Celestial Dragon Emperor himself. It is now the domain of Miao Ying, the Storm Dragon, and she defends it with her life and her soldiers.
Gameplay-wise, it has relevant and unique elements on and off the battle map. During a campaign, as you control, hold, and build up the Great Bastion as Cathay, Chaos forces will begin to gather, preparing to attack. You can ride out to usher them to a swift death or allow them to attack and break against the wall as so many have before them. Numerous events and small quests will be centered around these walls and controlling and managing them properly is a big part of the Cathayan campaign in the north.
Once on the battlefield, the Bastion is an incredibly defensible fortress – one single attackable wall with clear fallback points regularly interspersed towards the center. Strong walls with powerful towers are followed by swathes of buildable locations and defensible positions. However, all this is needed as the forces that will come to take it are truly titanic. The Chaos Gods know the value of breaching the Great Bastion, and their armies will flood from the Realm of Chaos if it is disturbed, be that by you or another faction.
Conquer your daemons, fight for the future
Be you attacking an enigmatic fortress of Tzeentch or defending the Great Bastion of Cathay – or anything in-between and beyond as any of the factions in WARHAMMER III – sieges are going to be something new and exciting. The new systems are highly flexible and moddable, giving far more tools for us (and you!) to expand them in the future. We’re looking forward to you getting your hands on it in early 2022.
Related Posts